Are you interested in Web Development and would like to start learning how to become a WordPress theme developer? Then this guide is for you. It’s a large resource for everything you need to know to start creating your own WordPress themes. Including links to other articles that can help you along the way. This tutorial is aimed at beginners but contains some more advanced techniques for intermediate developers too.
Put simply, if you want to create WordPress themes then your going to love this. This sets out a clear path you need to take to be able to develop WordPress themes.
Step 1) Learning HTML Is A Key Step
The whole of the web relies on html (hyper text markup language) to present the content to the user. This markup language is also key for creating WordPress themes as the theme helps to present the content and format the content so that the user can consume it effectively. To find out more then check out the basics of html here on EpicWebs.
The article above will explain what HTML is, why it is so important and how you can start using it. Once you have a grip on HTML then it’s time to move towards styling that html.
Step 2) Learning CSS, Let’s Make The Content Look Good!
Now that we have a grip on HTML, it’s time to take that HTML and make it look nice, a lot of work on a theme will consist of CSS so you need to make sure you are very comfortable with it and never stop learning it. You will be suprised how much you can achieve with CSS alone. To start learning CSS check out or basics of css article.
The article above will show you what a selector is, what you can do with selectors and how CSS actually works.
Step 3) Let’s Focus On The Layout, Wireframing

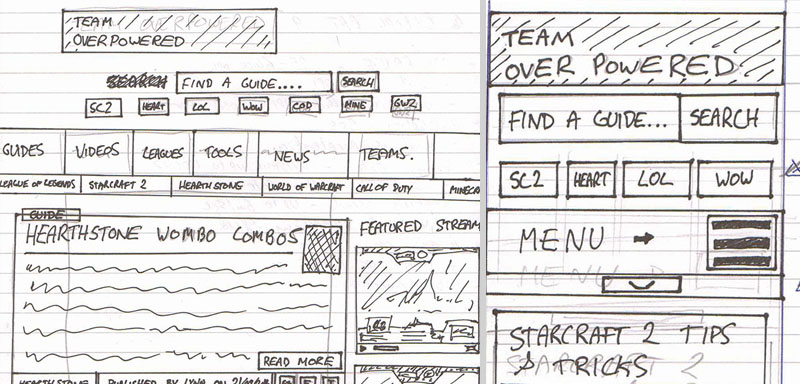
After you have learnt HTML and CSS it’s time to think about how you want your theme to be laid out. This step is usually over looked by most guides as they focus heavily on code or specifically photoshop design, but Wireframing is really important, especially for a modular theme. The great thing about Wireframing is that it makes HTML and CSS easier as you start to visualize each
Ok so we know what we want our theme layout to look like and we have the tools to get front end of the site looking how we want. Next it’s time to install WordPress and see what we can do with it.
Step 4) Installing WordPress
Now of course this step is key, you need to be able to install WordPress and be comfortable with the environment, it’s easy to sit back and design something great and then realise you don’t know the first thing when it comes to WordPress specifically, so let’s get it installed. Follow this article on EpicWebs or this one on the WordPress codex.
Once you have WordPress installed, login and start to add some pages, posts and categories to get a feel of how it works compared to other content management systems. Pages specifically is a good thing to look at as it can help understand how users manage their content and how they might want that content to look on the front end.
Step 5) Let’s Add Some Scripts & Change Some CSS
Now we have WordPress installed, install a theme called “BlankSlate”, this is exactly what it’s called a blank slate ready to start editing your theme on. First we are going to add jQuery to the footer of WordPress and then we are going to find out where our CSS file is and what we need to edit. Follow our how to add jQuery to WordPress footer article for this step.
After we have jQuery installed it’s time to add some CSS. Go to Apperance > Editor. The first file you see is our style.css file. We can alter this to make a lot of different changes to the front end of the website. Quick tip: Use Google Chrome inspector to find out which elements BlankSlate adds to the website for us or use Firefox and install Firebug. You can right click in the browser window and click inspect to start inspecting the page and find out which elements we have available to us.
Once we find out what elements we have, let’s start to style theme. Add the following CSS to your style.css file.
    body { background-color:#eeeeee; }
    #wrapper { margin: 0 auto; width: 1000px; background-color:#fffff; padding: 0 20px 0 20px; }
This will centralise your website, add some padding either side of the main div and make the background colour grey so that the content area stands out. Start writing your CSS and get it looking similar to your Wireframe, once you do then it’s time to move onto something a little more advanced.
Step 6) The WordPress Loop (This Is Important)
// The Query
$the_query = new WP_Query( $args );

// The Loop
if ( $the_query->have_posts() ) {
	echo '<ul>';
	while ( $the_query->have_posts() ) {
		$the_query->the_post();
		echo '<li>' . get_the_title() . '</li>';
	}
	echo '</ul>';
} else {
	// no posts found
}
/* Restore original Post Data */
wp_reset_postdata();
The WordPress loop is key to taking your theming skills to the next level. The WordPress loop is a set of functions that are used to grab data, loop through it until there is no more data and provide you with more functions for displaying that data on the front end. Take a look at the loop on the codex, it’s the best explanation and gives you an idea of exactly what you can achieve with it (which is a hell of a lot). Using WP_Query you can grab content from different categories, post types, custom taxonomies and even custom fields.
Now that you have looked a little at the WordPress loop/WP_Query, take a look at our Meta Queries guide on epicwebs.
Step 7) Use The WordPress Theme Customizer In Your Theme

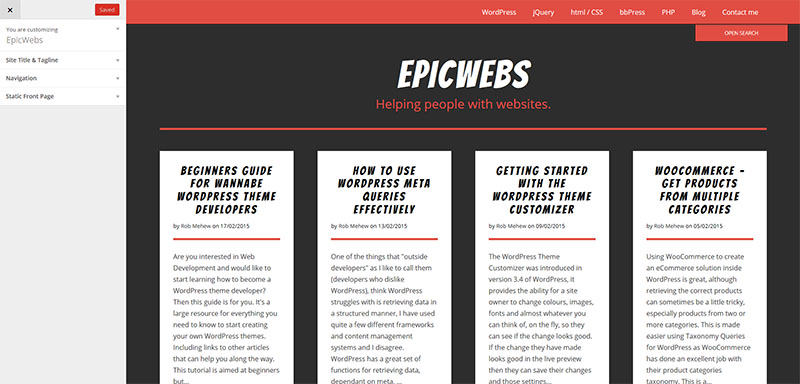
This next step might take a little jump compared to editing CSS, but it’s a great addition to any theme and hopefully more theme developers in the future will start taking it up. It’s also a great way to keep themes standard throughout so whenever you use different theme it allows you to quickly change options. The theme customizer will allow your users to change options and see them before they actually save them. Check out our getting started with the WordPress theme customizer guide to give it a shot and if you get any problems, leave on a comment on this article or that one for some help.
Excellent we have a base for our theme and some style options, it’s now time to look at some other options we might want to add by adding our very own theme options page (this is separate to the theme customizer).
Step 8) Creating A WordPress Theme Options Page
As with step 7 this does take a little step up from editing CSS or adding jQuery to your theme. If you want to jump straight into the code then take a look at our how to guide on creating WordPress theme options page. This guide takes you through the steps of creating a theme options page and then using that page to it’s full effect. When users download a custom theme (especially if they have paid for) they expect a few extra options than just a normal base theme, they want something extra, even if the functionality isn’t all that great.
Step 9) Test, Test and Test!
The one thing you don’t want to happen is for someone to purchase or download your theme and to have loads of complaints because something that was built inside the theme is broke or just doesn’t work. You want to make sure that your theme is as good as it can be, so test it repeatedly. I can stress enough how important it is to test, it’s often part of developer, yet sometimes small things can be broken on themes which are really irritating.
Step 10) Upload Your Theme And Be Happy With Your Creation
This is the final step, it’s important that users can find your theme but first you need to make a decision. Will your theme be free or paid for? If it is a paid for theme then you need to look at uploading it to a place like ThemeForest, TemplateMonster or Elegant Themes. If your theme is free then I would recommend hosting it on GitHub and then sending people to it from your website, get some feedback and then look at moving it over to the WordPress theme repository. There is a few guidelines you need to check before you upload your theme and some premium market places can be even stricter, so make sure it looks great and there are no PHP warnings or errors. Take a look at the WordPress Theme Checklist to see what you should be doing.
Comments